Monday 21 November 2016

Sorry I haven't written in a long while.  A lot has happened in the time I've been away.  I dropped my laptop and didn't have one to post from. That always is terrible and I felt lost without it.

I don't know if I have mentionned it before but I am addicted to Kijji.  I find lots of awesome things for free or sold for a very low price.  It's like a treasure trove. One man's junk is another mans treasure.

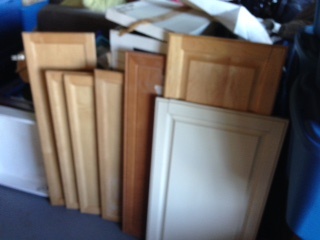
My most recent treasure is an oak dresser made around 1910!  I paid $40.00 for it and I can't wait to refinish it. I'm thinking of staining the top and painting the rest with chalk paint in a cream or white. I just picked it up yesterday and may need to look at it a week or two before I make my final decision on colour.


It has some water stains on top but I'm sure I can sand them off.  They look like they are pretty superficial. Each drawer has a little lock on it.  The key is missing but I imagine I will never need it anyhow.

I love the way the sides are made with a panel instead of a plain straight side.

 Look at the back!  It is slats.  I love it.

I can't wait to get started sanding it down.  I will start on the weekend. That is the trouble with working full time and having to wait till the weekends to work on my projects.

Speaking about projects...I have been working very hard to get ready for a craft sale that I had a table at this last weekend.  I didn't have everything ready as I had to go to Montreal for an emergency and was there nearly three weeks.  I returned on Friday night about 11:00 pm.  I managed to get enough together and attend my table at the sale.  I sold a lot of products and had a lot of awesome feedback on my items.  Everything was had made but I wish I had taken some photo's. I only had this one!


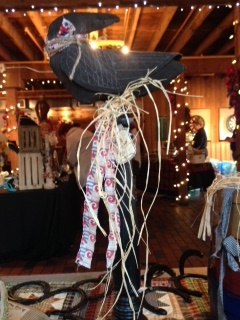
I sold a couple of horseshoe crosses, rag dolls and orneries.  Oh, and a ton of homemade soap and wooden painted signs.


I also had rag dolls for sale that were like the following...


I will update you with the dresser as it is worked on and I can't wait to get started on it.

Till next time.

Saturday 13 August 2016

Hello everyone!

 So I started my first project with one of the cabinet doors.   I picked one that i thought was the perfect size for a chalkboard Laundry sign.


  First I sanded "The Chosen One" and taped it off.  Then I used chalk paint to paint the frame of the door.

Once the chalk paint was dried I carefully removed the painters tape and then retaped so that I could paint the chalk  board surface. Using Rustoleum Chalkboard Paint I painted a first coat on the chalk board surface and then waited 24 hours to let it dry before  I applied a second coat.


Then I took a sanding pad and distresssed the chalk paint frame. Later I put some black paint thinned with water and a rag.  I rubbed it all over the cream chalk painted frame and rubbed it in to further distress and give it an aged look.

The next step was to take a clean rag and rub wax into the chalk paint frame buffing it as I went. I'm not quite finished waxing and buffing yet as I want to put two coats so I applied a second coat of wax and am waiting for it to dry now.

I then painted the word LAUNDRY on the black surface.
VOILA my laundry sign made with a cabinet door!


Tuesday 2 August 2016

I had such a successful weekend and managed to acquire some awesome finds for free.  The first find was a bunch of spindles.  They are painted brown but I will be stripping them and I can barely wait to use them.  I have tons of ideas for them. I just need to get the time!  Most days, well everyday really, I wish I could be a stay at home mom and craft and create all day, all the time!

Back to my spindles!  I found a lady who was redoing her patio and she had 17 spindles to give away.  I was thinking one of my first projects may be bird houses perched on different height spindles. I have many more ideas for them but I will post everything that I make with them.


My next find was kitchen cabinet doors.  I found a guy who had a trailer full of miscellaneous, solid wood cabinet doors.  You had to dig through the trailer (which sounds much easier than it actually was). I grabbed a bunch, my husband didn't want me to grab too many..killjoy!

My first order of business with these cabinet doors is to make some signs and chalk boards! I've already started with them. More to follow on my next post with this project!

My third great, free find was a bunch of skids or pallets, whatever you want to call them! So many possibilities with these. 


The hardest part of working with these is deconstructing them. After that it's easy peasy to work with them.  I decided to make a friend who is from the U.S an American flag to hang on his wall.  I deconstructed a couple and put it back together in the shape of a nice rectangle.  


I've sanded the heck out of it and now it is ready to prime and then paint. I purchased little stars to paint to give it some depth rather than paint the stars on it.  Once painted I will grunge it up and distress it to give it that primitive look. 

I can barely wait to paint it but I will have to wait till the weekend to paint it as that's when I'll have the time. I will post the finished product on Sunday night!

Thursday 9 June 2016

I've finally finished my newest project.  It's a lap blanket for one of my friends.  I'm driving up to see her tomorrow.  

I cut my pieces free hand. I have trouble following a pattern. I truly believe I may have ADD but I digress. I suppose if I've lived this long not knowing I don't really need the label. It would explain alot though.


It's a variation of a pattern I found in Rebekah Smith's book "Wool Applique Folk Art".
She has really pretty patterns and great ideas.  Please check out her blog . I am pretty much in awe of her work. All her stiching is perfect. I promise Rebekah, if you see this I will practice and practice and I will make you proud! 


Mine in no way does her design justice but it's my first time using felted wool in this way.  I usually use it to rug hook. My stiching is usually comprised of quilting! I know I have a long way to go before I'm not ashamed! 

You will love her book and it will inspire you to start stiching!!


Saturday 4 June 2016

I am soooo excited.  I just got a banged up old solid wood coffee table that needs some love for free!!! Yes, absolutely free.  I could kiss the ground the giver walks on!  I have given many almost brand new items for free over the years but this is the first time I've gotten one.


I took a picture of it for you all to see and once it's refinished I will post a new picture.The other project I have on the go is 4 beat up old kitchen chairs that look like someone left them in the garden for a couple of years.

My husband sees garbage but people like us see potential.  I told him that you need to have a vision.  Anyhow, I need a new hobby since my cowgirl dream kept breaking my bones. This last time has been really hard. It't been over a year now since I broke my back and I' still suffering. So sold the horse...very sad, and needed a new hobby. So added furniture refinishing onto my list of crafting adventures.

I'm also waiting to get a kiln from my bestest friend Kari. So whoo hoo then I can try my hand a pottery.

I'm sure like many of you, there are not enough hours for everything you want to do. It's sad that we have to have a full time job to pay for our creating addictions! I wish I was like Kristen Nichols who lives on a sheep farm and has a studio where she gives classes and creates. Check her out, she is amazing in everything she creates.  I love her work so much. She inspires me and my dream is to have a life like hers.

I took her course on Craftsy on Crewel embroidery and it was so informative.  Sue Spargo is also someone who inspires me. She also has a course on Craftsy on embellishing stiches Check her out.

Till next time.
Holly

Saturday 28 May 2016

What's New

Hi,

I've been off line for a bit as I had just returned to work after having major back surgery and needed to recover.  The last year has been a long haul.  On April 25th, 2015 I was thrown from my horse, Dakota.  I ended up with a burst fracture of my L2 vertebrae.  I initially had to wear a big brace for 3 months unless I was lying in bed.  After the three months I was in constant pain and so in January I had my spine fused and now am the owner of some nice screws, bolts and rods. 

I am on the road to recovery now and can get back to working on this blog.  Trying to make it successful.

While I've been off I've done some creating and would like to share my newest endeavor....making a braided rug!  It's not finished yet but I thought I would share it thus far and instructions on how to get started on your own braided rug.

The first step is for you to gather some old sheets or garments.  I used old sheets.  My colours aren't great but you will get the idea regardless.

Once you have a couple of sheets (I used 2 queen sized and one twin).  You will tear them or cut them into strips.  The width will depend on how thick you want your carpet or place mat to be.  Mine were torn into 1 inch strips. Here is a picture of my Bestest Friend Kari tearing away.  It took a long time to get enough strips so I put her to work! I can delegate! LOL


When we had enough strips we put them in a basket to keep them out of the way. I have quite the pile as I want to make a throw rug. 


Next you start to braid.  Tie three strips together and make sure you keep braiding in the order and keep the braid straight so that it doesn't twist.


Keep braiding and add new strips into the braid so that it is one continuous long braid.  Here is a picture of mine!


I rolled my braid into a ball.


Once you have it all braided then you can start sewing it together by rolling it around a center point. Just keep going around and round sewing the braid to the braid and the rug/placemat will get larger and larger as you go.


It will take me a bit to get this finished as I have a serious amount of braided material to attach.  Once it is completed I will post a picture for you.

I wasn't picky about my colours.  So think about the colours you want to use. Next time I will. But if you are like me and want to see if it's something you want to do before you make any investment then old sheets and clothing are the way to go!

Talk to you soon!

Holly

Thursday 17 March 2016


How to dye wool fabric for wool applique or rug hooking


The evening before you will be dying your fabric you should take your felted wool fabric and section it into smaller pieces. If you use new wool (I usually buy my new wool in natural or white and I prefer the Door Mill wool fabric by the meter or by the yard in the US. I cut the fabric into fat quarters and depending on what I'm going to use it for I may cut it into smaller squares.

The second step can be skipped if you like, depending on how you want your dyed fabric to look. If you would like your fabric to be dyed to a uniform colour the you will need to do this. In a bowl large enough to hold enough water to cover your fabric place warm water and a drop of liquid dish soap. I usually use Palmolive but any will work. Once you have done this place your fabric in the bowl and let it soak overnight.

If you choose to skip this step that is fine but your dyed fabric will not be uniform and will come out mottled. If you are like me you will like this. I find it gives some texture to the fabric when dying a solid colour.

When you are ready to dye the fabric after soaking, drain the bowl and wring out the fabric. Flatten out the fabric and put aside.

Prepare your tools. You will need the following:
  • Large Pot
  • Latex or rubber gloves
  • Acid dye (Pro chem or Jacquard are the ones that I know)
  • Mixing bowl
  • Measuring cups
  • Measuring spoons
  • Wooded spoon
  • White vinegar
  • Timer


    Take a large pot and fill it 3/4's full of water. Bring the water to a boil.

    Mix a teaspoon of powdered acid dye into 2 cups of water. Mix until it is all dissolved.

    Once the water in the pot has boiled add your dye mixture into it and bring it to a boil once again.


    Once it is boiling add ¼ cup of white vinegar to the dye mixture . The vinegar acts as a setting agent. You could also use citric acid but vinegar is much easier to find at the local store.


    Once it is boiling again add the wool fabric into the mixture one piece at a time. Please note that each piece of fabric will come out different intensity of the colour dependent on how long it's been in the dye bath.


    Let the mixture with the fabric simmer for 30 minutes.


Stir the pot once or twice while it is simmering. Making sure that every part of the fabric is absorbing the dye.


    After the fabric has simmered for 30 minutes dump the whole pot load into the sink and rinse the fabric with cold water. Wring out the fabric and you can either place it on towels or hang to dry. You could also stick it in the dryer.

You will notice the different colours I made from this pot of dye.


That's it, that's all. It's so easy!!!

Wednesday 9 March 2016

March 2016

Hi All!

I would just like to introduce myself.  I'm Holly and I am constantly creating.  I live and breathe making stuff.  What I like to make the most is old beat up looking, primitive creations but I create other items too.

I went to a home decor store the other day (one that has mostly country decor) and as I walked around I was saying to myself that the prices were insane. Everything I liked I would say to my son, James, "I'm not paying that, I can make it!" Once I got home and while I looked at all  my craft supplies and items I've made I thought..."I could save people money if I tell them how to make the things I do". So I've decided to share my knowledge and abilities

After talking to my daughters, who are way more tech savvy than I myself , I got down to business and got to work creating a blog.

I am very exicited to move forward with this blog and what it can do! My kids are just totally shocked I managed to do it myself LOL. I will shortly post my first how to as well as add detailed instructions and what you would need to create.  I will also add some pictures of my finished projects.

So please enjoy and of course save your self some money by doing it yourself. The joy of creating your own item will make it even better!

Help me make this site successful by following me! Come back often for new ideas and feel free to sign my guestbook or send me questions.  I'll try to get back to you really quickly but I do work full time and have three kids still living at home so I may take at least 24hrs to respond.

God Bless!